
So, I've been a rather bad blogger and have made a lot of sewing projects that I haven't posted. I'm finally committed to posting them and took all the pictures at once so that is why there is going to be several posts back to back.

I think I'm looking for my pocket.

First up is a navy polka dotted pj set. The fabric is a woven rayon that I got at the thrift store, it used to be a long skirt and a t shirt with shoulder pads. It was kind of terrible, but the fabric is really nice.
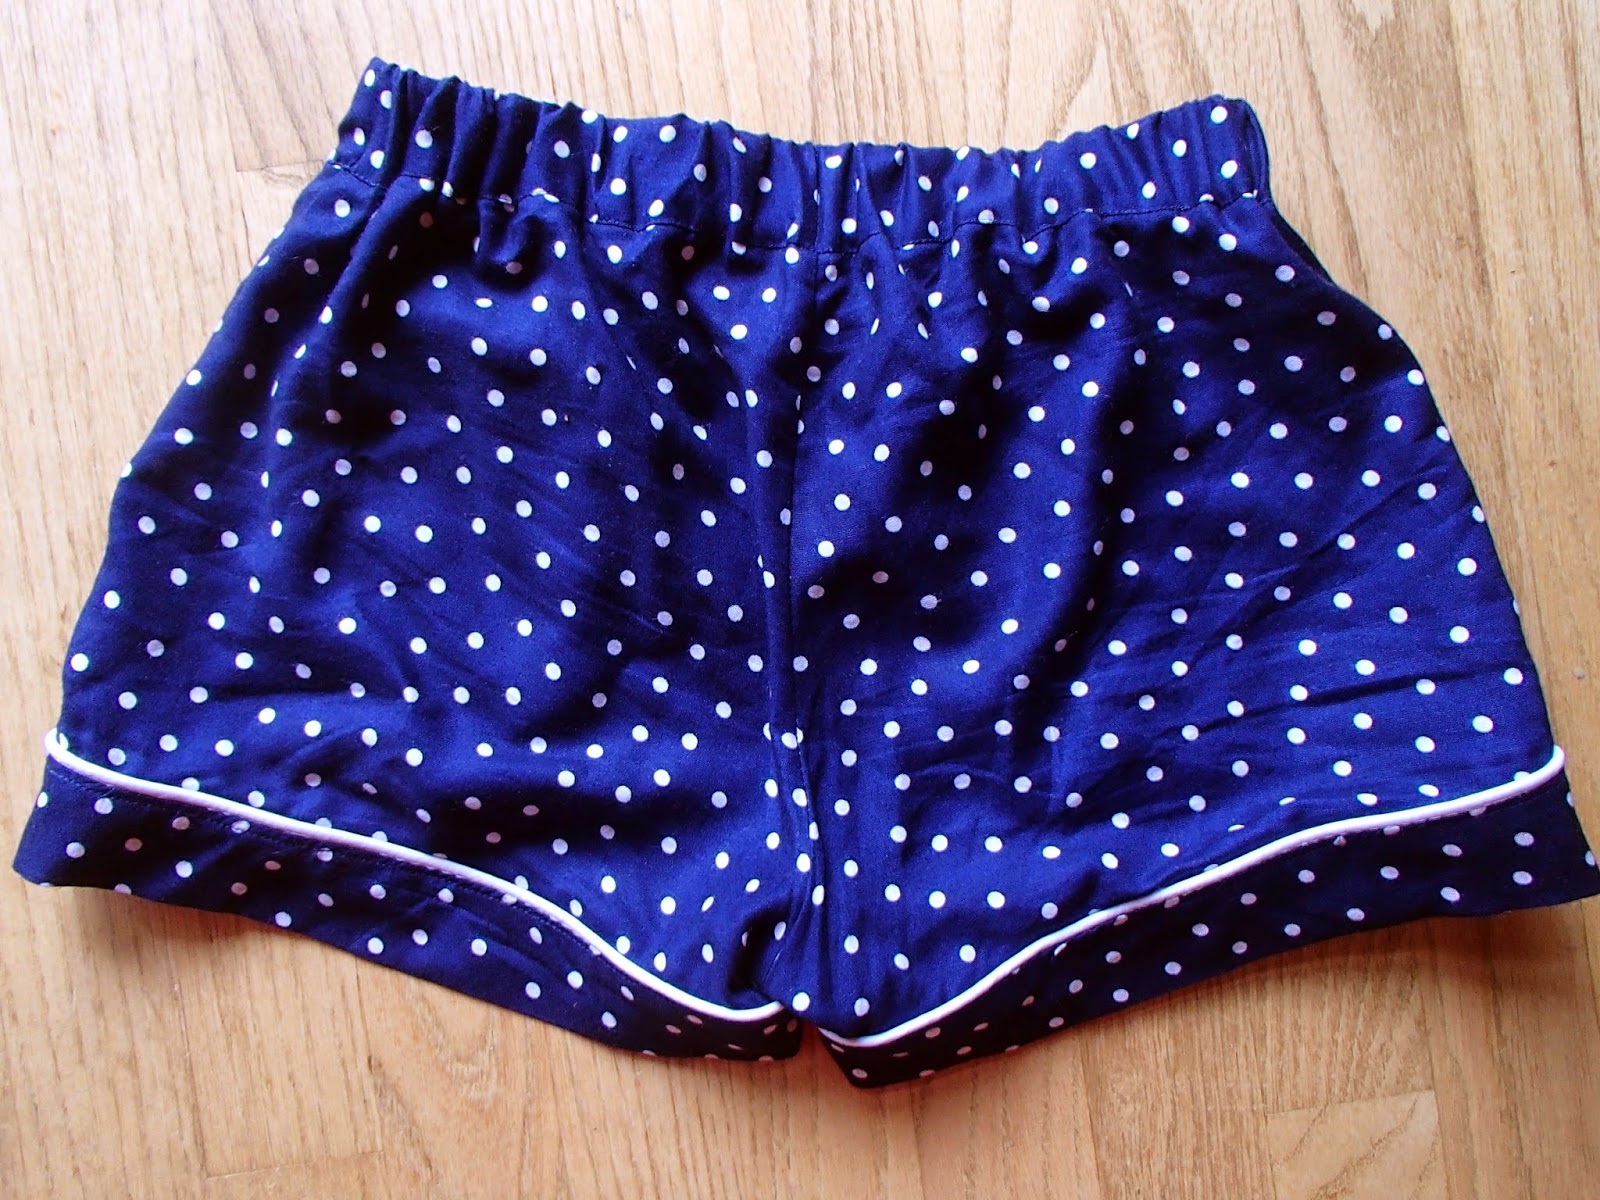
The white piping is just the regular store bought kind. I thought about making my own because I thought it might be kind of stiff or heavy for the fabric but I was too impatient to get anything else. I think it worked out okay anyway.

The pattern for the shorts is the Carolyn Pajamas by Closet Case. I cut a size 0 and didn't make any changes, other than to narrow the waist band a little bit so it would fit the width elastic I had. (it tells you to use 1.5" but I only had 1.25"). I also added piping to the pockets which isn't in the instructions but I wanted them to stand out a bit more. I really like the way she has you do the cuffs and waist band, it takes more time but everything is nice and tidy.

For the top I didn't have enough fabric to make the button down top that comes with the Carolyn pattern, which I was sad about because it was my original vision. But I found this free tank pattern and made it work.

The pattern is the Diana Cami pattern by Spit Up and Stilettos. I cut the smallest size and made a few changes. My back has a seam because I needed it to fit my pieces, but I don't think it looks terrible. I also shorted it by and inch or so, just because I thought it looked better with the shorts that way.

I used store bought white bias binding for the edges so it would match my piping. I had a bit of an issue with where the straps meet the bodice, probably because I wasn't following directions like the careless rebel that I am. So I problem solved by adding little tubes of binding at the tops, I actually rather like how it looks now that everything is said and done.

I thought about doing french seams but ended up just serging them. I like that it cuts down on bulk.

When I uploaded some of these pictures turned out saturated, but the fabric really is navy not bright blue. (Edit: I fixed it. Apparently there was some auto photo enhance option that needed to be turned off)

The detail in the back adds some interest, if I made another one I would probably make the back lower cut with criss cross straps or something. Just for variety.

I feel like my leg looks weirdly photo shopped in this photo by my knee. I swear if I had edited my pale thin legs they would look more normal.

I probably could take the sides of the shorts in a bit, they seem to fit tighter on most of the makes I've seen, but they are comfy the way they fit now so I hate to mess with it.

Problem solving.

This robe is not a new make. I want to say I made this in either December or January, but I'm not entirely sure.

The pattern is simplicity 1562. I'm not sure I would really recommend it. There are a lot of robe patterns out there and this one is not great. I added the hanging loop on the back and added side seam pockets instead of patch pockets. I think I cut the smallest adult size.

I also changed the sleeves to have sewn on cuffs, like the 7 year old worn out rtw robe I was replacing had. I made my pockets a little too low. I have to stretch my fingers out all the way to touch the bottoms.

Two parts of the pattern really got to me. First the instructions do not tell you to sew down the really wide facing that runs along the opening. You are just supposed to let that thing flap in the breeze. And then if you do sew it down it's like six inches wide so it will look ridiculous on the outside unless you do some invisible hand stitching. I tried that and I could still see the tiny puckers on the outside and it was killing me. So I did some investigating on my rtw, cut the facing down to a couple of inches, finished edge and sewed it down.

It looks a tad wonky in this photo, but it doesn't bother me too much. The other thing that got me was the robe tie was wayyy shorter than my rtw one, like 9" shorter. It's long enough to tie it once but that's it, there's nothing fancy happening with it. It is not long enough to hit other people with while wearing it either. I think it was also one piece for all sizes which blew my mind.

The fabric I used is red ultra cuddle fleece from Jo Anns. It is super soft and comfy so no regrets there. It does shed really bad so seam finishing is a must.

I love making my own clothes and having nice long sleeves. Rtw ones are always too short.

On to cat shorts!

I might have directly copied another blogger because I am a big fat copy cat. The fabric is Catnap by Lizzy House.

The pattern I used was a free download called Weekend Linen Shorts from sew daily. It didn't come with instructions but I wasn't worried about it. I cut whatever the smallest size was.

I added in seam pockets because I am a firm believer in pockets.

They are a little loose but comfy.

If I had owned the Carolyn Pattern when I made these I probably would have used that shorts pattern instead, but it's probably best I didn't so I have more variety. I think I do like the pockets better on the Carolyn though as opposed to my inseam ones.

Cute kitty faces. I just happened to have this (rtw) tank top in a very similar coral color to the cats cheeks, so I deemed them a set.

I'm actually really allergic to cats, but I love them anyways. These are the only ones allowed in my bed though.

My drawstring is purely decorative, it just goes in one button hole and out the other with a small stitch in-between to stop it from coming all the way out. I don't really like the bulk of functional drawstrings and I make my elastic tight enough not to need them, but I like the way it looks.
No comments:
Post a Comment