Wednesday, May 20, 2015

Mustard Shorts + Jalie Racerback Tank Tops + Striped Nettie Shirt

I've been on a summer sewing kick lately and have been trying to get some new warm weather clothes done before the really warm weather actually hits.


First up, some mustard shorts. I'm particularly fond of the color mustard, I don't know why because I don't like the condiment at all. I looked for good mustard fabric, but didn't find any I really liked... until I found a pair of plus size pants at the thrift store.


Initially I thought I had lots of fabric to work with, but I ended up just barely squeezing my pieces on.


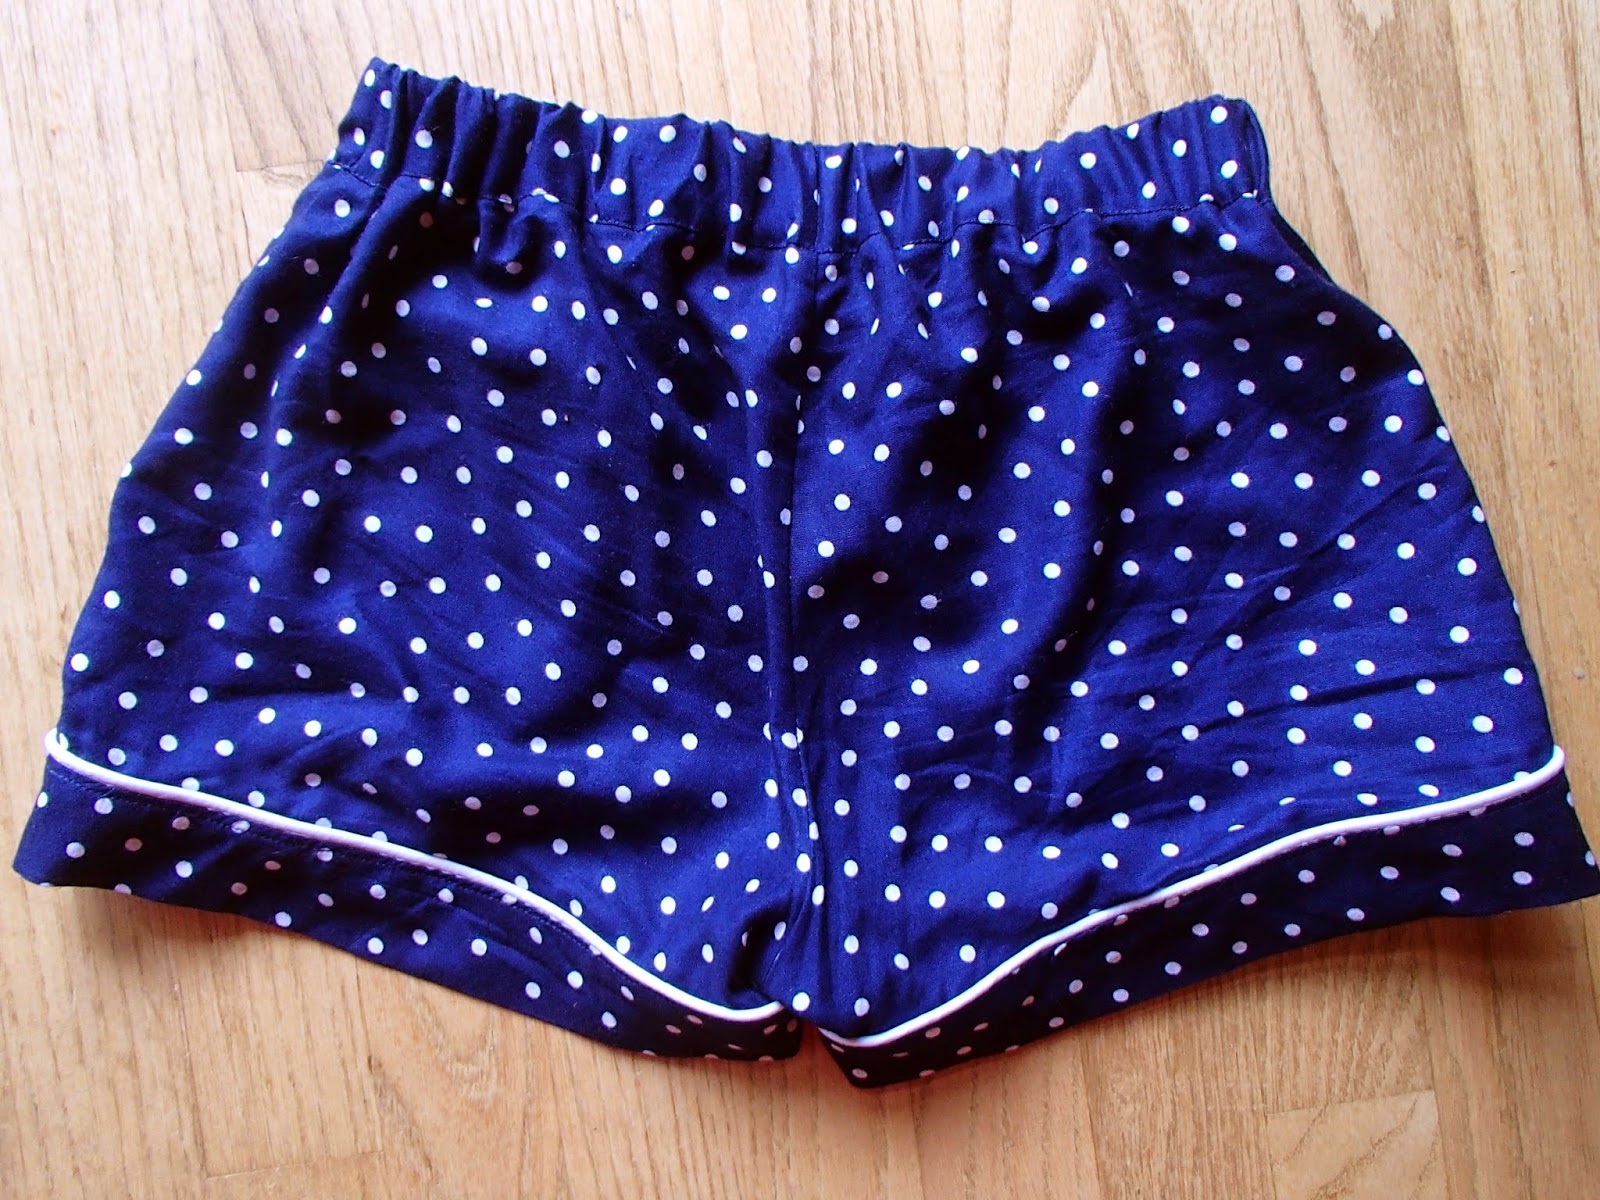
The pattern that I used is a pretty tried and true one for me. I've made them three times red, gray, striped. It's a free Owly Baby pattern, available here, with modifications to fit. These are most similar to my striped pair because I left off the leg cuff, I didn't have the fabric.


I serged some of the seams, which is something different from my other pairs. I didn't have my serger when I made the other ones. For the inside waist band and the pockets I used a white cotton with tiny anchors on it. I actually got it from the thrift store as well...it used to be boxers. I think it was probably interesting as boxers because the fabric is very thin and somewhat see through...


I managed to catch not one, but both pockets, in seams that they shouldn't be in. That's talent. One is an easy fix, it's just the belt loop stitching that messed it up, but the other one requires re doing part of the waist band seam. Sigh. It's not affecting the functionality of the pockets but I know I should fix it.


Also in one of those oh-my-god-what-have-I-done moments I somehow cut a tiny hole in the fabric. It's on the right side of the fabric and doesn't go all the way through. I immediately put fray check on it and it seems pretty stable now. But it made me not a happy camper.


I feel like I might have made too many pairs of shorts given how the weather is around here, but I can't help it, I want to make more. I want a polka dot pair and a floral pair...


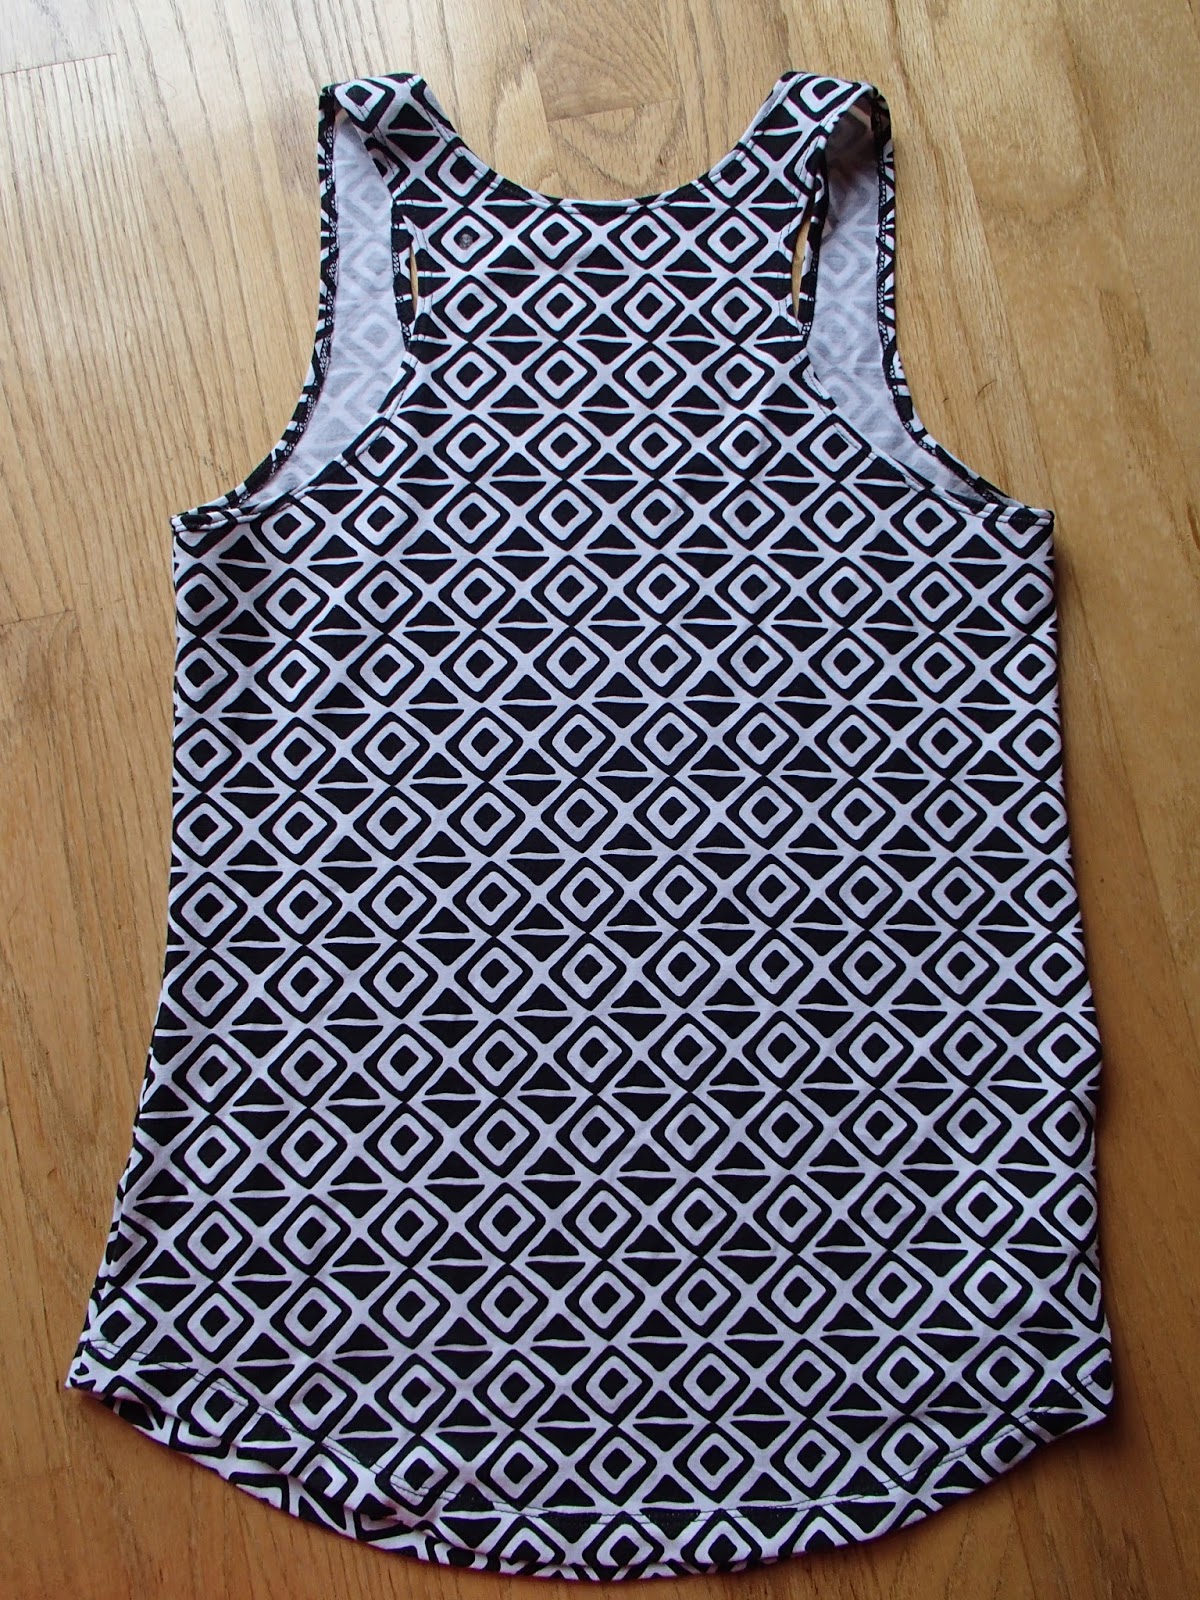
On to tank tops. The pattern I used is Jalie 3245, I cut a size O and made a few modifications. 


The first being following this bloggers lead and leaving off the binding. I just folded the edges under and did a cover stitch. This worked out really well on the first tank top but on the second one my serger wasn't having any of it and stretched some parts out of shape. I was able to iron it back into submission with enough steam. So, it mostly worked out, maybe stabilizing it some how would be a good idea.


I also took about 2 inches off of the hem, just not a fan of how long it looked on me. My torso is a little short though.


I was able to sew the whole thing on my serger, so yay for that.


Cover stitched hem. The fabric is Panache in Profundo from the Petal and Plume collection. I bought it from Hawthorne Threads here.


Exact same situation with this one, just different fabric.


This fabric is from Girl Charlee. It's actually still available even though I bought mine last summer. I horde fabric a bit.  


Next up is a Nettie bodysuit made shirt. I cut the smallest size and I'm pretty sure that was a mistake because this sucker is tight. I fell well within the measurements for the smallest size but I think I just wasn't accounting for how tight bodysuits are and how maybe I wouldn't want my shirt that tight.


I cut the scoop neck and medium scoop back. I originally had long sleeves but they were so TIGHT, and I have seriously skinny arms...like bracelets don't fit me skinny, like the people at the fair that put wrist bands on you make comments about it skinny. I would be weary of the sleeves...


After I hacked them off they were a lot better. I sewed the whole thing on my serger, which was nice but didn't allow for a lot of fit changes. I also had some issues with the sleeve caps sticking up weird. I added fabric to the shoulder on the neck side to try to make sure it would stay up and cover my bra straps but it still really doesn't. It's really kind of a finicky shirt to wear and I have to adjust it a lot. I should probably try to make another one with changes but I'm just not excited about it.


All ready for summer.


I really like the curve of the hem on the Jalie tank top pattern.


And this is how it looks in flight.


The fabric I used for the shirt is a Riley Blake jersey knit from Fabric.com. It kind of bothered me that it is printed not yarn knit, it doesn't look that great when it stretches, which is kind of the point of a knit if you ask me. I don't think it's worth the price.


I do like how you can wear a bra with the medium scoop.


Look Ma, I can match prints! (sometimes)


I do like black and white + mustard shorts combination.


I tried this one with the mustard shorts, but I like how it looks better with my gray shorts from last year.


I should probably wear a racerback bra with this in the future...


I am really digging this print.


I also made my mom a tank top using the same pattern for Mothers day. I cut a S for her based on her measurements and took about two inches off the length, I probably could have took more off since she is shorter than me. The fabric is Specks Knit in Carambola from Hawthorne Threads.

Quilted Linden Sweatshirt + Two Tone Futuristic Sweatpants


Neither of these items are new, I made them both around January/ February/ winter sometime and I have worn them sooo much since then. If I could only wear one outfit in my house forever I would pick this one. It is comfy, easy, and for some reason I just feel cool wearing it. 


Hey foot, what's happening?


First up is the quilted linden sweatshirt. I copied this like the big fat copy cat that I am from this blogger. I used the same fabric and made the same pattern changes so, yeah. But when you like something you like it.


The Pattern is the Linden Sweatshirt by Grainline, I cut the smallest size and didn't make any changes other than to use sold black fabric for the triangles on the sides. Katy at Sleek Silhouette shows exactly how cut apart the pattern to do that, I just copied.


The ONLY thing I don't like about this sweatshirt is the way the fabric is holding up. I know I wear it like everyday, but I don't do anything active in it and I usually wear a t shirt under it so I don't wash it all the time. The quilted fabric is holding up better than the solid, not pilling but it does snag a bit. I've thought about taking the solid parts out and replacing them, but I should probably just make a new one.


I kind of want a hundred Linden sweatshirts. And quilted sweatshirts. I think there are really endless possibilities with this pattern.


I serged all my seams, super fast and easy. 


On to my pants! The pattern I used is pretty TNT for me, Simplicity 2061 with modifications. Most of my modifications I covered in this post, the only new changes are the color blocking at the bottom, and I added back pockets.


To do the color blocking I basically just hacked off the pattern at a diagonal where I thought was good and then added seam allowances to both pieces. For the pockets I used a pocket piece from my shorts pattern, but that piece was originally just traced from one of my rtw jean pockets.


It was a little finicky since the fabric is so stretchy, but I  made it work. The fabric I used is Power Stretch Polartec from Mill Yardage. It can be kind of pricey depending on what color you want, but it is really nice. Super soft on the inside and very stretchy. It does have a very synthetic feel though, you can tell there is no cotton involved.


 Because the fabric is a lot stretchier than what I've made this pattern with in the past the pockets ended up a little long, and I think the front seam is a little long too, so it bunches a tad sometimes.


I got my inspiration for the diagonal color blocking from here, and basically copied their back pocket too.


From the back I am a sleek black ninja...


 I just noticed that in these pictures you can see an Easter basket sitting in the background still,


I feel like the legs look a little star trek for some reason? But I like them. It's important to feel futuristically cool in your lounge clothes.


They are stretchy enough to jump in. I tested.

Navy Polka dot Pj Set + Red Robe + Cat Pj Shorts

So, I've been a rather bad blogger and have made a lot of sewing projects that I haven't posted. I'm finally committed to posting them and took all the pictures at once so that is why there is going to be several posts back to back.


I think I'm looking for my pocket.


First up is a navy polka dotted pj set. The fabric is a woven rayon that I got at the thrift store, it used to be a long skirt and a t shirt with shoulder pads. It was kind of terrible, but the fabric is really nice. 


The white piping is just the regular store bought kind. I thought about making my own because I thought it might be kind of stiff or heavy for the fabric but I was too impatient to get anything else. I think it worked out okay anyway.


The pattern for the shorts is the Carolyn Pajamas by Closet Case. I cut a size 0 and didn't make any changes, other than to narrow the waist band a little bit so it would fit the width elastic I had. (it tells you to use 1.5" but I only had 1.25"). I also added piping to the pockets which isn't in the instructions but I wanted them to stand out a bit more. I really like the way she has you do the cuffs and waist band, it takes more time but everything is nice and tidy. 


For the top I didn't have enough fabric to make the button down top that comes with the Carolyn pattern, which I was sad about because it was my original vision. But I found this free tank pattern and made it work.


The pattern is the Diana Cami pattern by Spit Up and Stilettos. I cut the smallest size and made a few changes. My back has a seam because I needed it to fit my pieces, but I don't think it looks terrible. I also shorted it by and inch or so, just because I thought it looked better with the shorts that way.


I used store bought white bias binding for the edges so it would match my piping. I had a bit of an issue with where the straps meet the bodice, probably because I wasn't following directions like the careless rebel that I am. So I problem solved by adding little tubes of binding at the tops, I actually rather like how it looks now that everything is said and done.


I thought about doing french seams but ended up just serging them. I like that it cuts down on bulk.


When I uploaded some of these pictures turned out saturated, but the fabric really is navy not bright blue. (Edit: I fixed it. Apparently there was some auto photo enhance option that needed to be turned off)


The detail in the back adds some interest, if I made another one I would probably make the back lower cut with criss cross straps or something. Just for variety.


 I feel like my leg looks weirdly photo shopped in this photo by my knee. I swear if I had edited my pale thin legs they would look more normal.


I probably could take the sides of the shorts in a bit, they seem to fit tighter on most of the makes I've seen, but they are comfy the way they fit now so I hate to mess with it.


Problem solving.


This robe is not a new make. I want to say I made this in either December or January, but I'm not entirely sure. 


 The pattern is simplicity 1562. I'm not sure I would really recommend it. There are a lot of robe patterns out there and this one is not great. I added the hanging loop on the back and added side seam pockets instead of patch pockets. I think I cut the smallest adult size.


I also changed the sleeves to have sewn on cuffs, like the 7 year old worn out rtw robe I was replacing had. I made my pockets a little too low. I have to stretch my fingers out all the way to touch the bottoms.


Two parts of the pattern really got to me. First the instructions do not tell you to sew down the really wide facing that runs along the opening. You are just supposed to let that thing flap in the breeze. And then if you do sew it down it's like six inches wide so it will look ridiculous on the outside unless you do some invisible hand stitching. I tried that and I could still see the tiny puckers on the outside and it was killing me. So I did some investigating on my rtw, cut the facing down to a couple of inches, finished edge and sewed it down.


 It looks a tad wonky in this photo, but it doesn't bother me too much. The other thing that got me was the robe tie was wayyy shorter than my rtw one, like 9" shorter. It's long enough to tie it once but that's it, there's nothing fancy happening with it. It is not long enough to hit other people with while wearing it either. I think it was also one piece for all sizes which blew my mind.


The fabric I used is red ultra cuddle fleece from Jo Anns. It is super soft and comfy so no regrets there. It does shed really bad so seam finishing is a must.


I love making my own clothes and having nice long sleeves. Rtw ones are always too short.


On to cat shorts!


I might have directly copied another blogger because I am a big fat copy cat. The fabric is Catnap by Lizzy House.


The pattern I used was a free download called Weekend Linen Shorts from sew daily. It didn't come with instructions but I wasn't worried about it. I cut whatever the smallest size was.


I added in seam pockets because I am a firm believer in pockets.


They are a little loose but comfy.


If I had owned the Carolyn Pattern when I made these I probably would have used that shorts pattern instead, but it's probably best I didn't so I have more variety. I think I do like the pockets better on the Carolyn though as opposed to my inseam ones.


Cute kitty faces. I just happened to have this (rtw) tank top in a very similar coral color to the cats cheeks, so I deemed them a set. 


I'm actually really allergic to cats, but I love them anyways. These are the only ones allowed in my bed though.


My drawstring is purely decorative, it just goes in one button hole and out the other with a small stitch in-between to stop it from coming all the way out. I don't really like the bulk of functional drawstrings and I make my elastic tight enough not to need them, but I like the way it looks.