Wednesday, May 20, 2015

Navy Polka dot Pj Set + Red Robe + Cat Pj Shorts

So, I've been a rather bad blogger and have made a lot of sewing projects that I haven't posted. I'm finally committed to posting them and took all the pictures at once so that is why there is going to be several posts back to back.


I think I'm looking for my pocket.


First up is a navy polka dotted pj set. The fabric is a woven rayon that I got at the thrift store, it used to be a long skirt and a t shirt with shoulder pads. It was kind of terrible, but the fabric is really nice. 
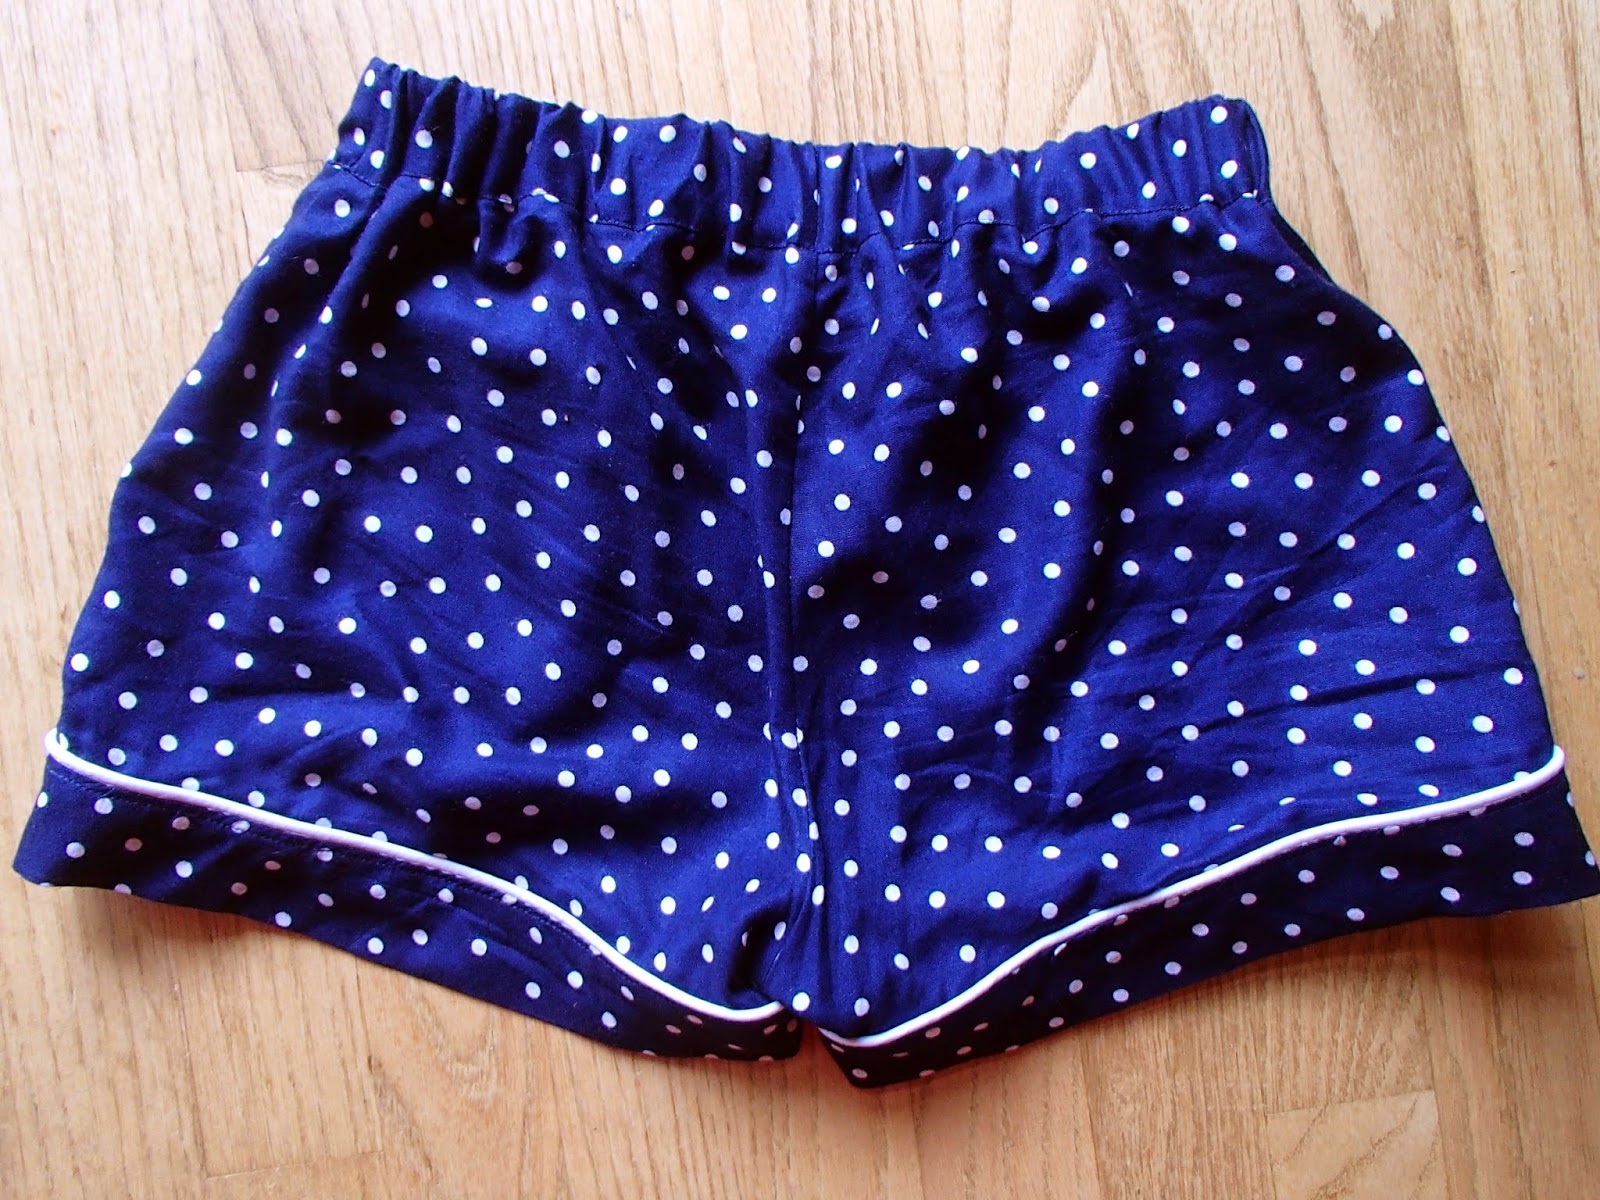

The white piping is just the regular store bought kind. I thought about making my own because I thought it might be kind of stiff or heavy for the fabric but I was too impatient to get anything else. I think it worked out okay anyway.


The pattern for the shorts is the Carolyn Pajamas by Closet Case. I cut a size 0 and didn't make any changes, other than to narrow the waist band a little bit so it would fit the width elastic I had. (it tells you to use 1.5" but I only had 1.25"). I also added piping to the pockets which isn't in the instructions but I wanted them to stand out a bit more. I really like the way she has you do the cuffs and waist band, it takes more time but everything is nice and tidy. 


For the top I didn't have enough fabric to make the button down top that comes with the Carolyn pattern, which I was sad about because it was my original vision. But I found this free tank pattern and made it work.


The pattern is the Diana Cami pattern by Spit Up and Stilettos. I cut the smallest size and made a few changes. My back has a seam because I needed it to fit my pieces, but I don't think it looks terrible. I also shorted it by and inch or so, just because I thought it looked better with the shorts that way.


I used store bought white bias binding for the edges so it would match my piping. I had a bit of an issue with where the straps meet the bodice, probably because I wasn't following directions like the careless rebel that I am. So I problem solved by adding little tubes of binding at the tops, I actually rather like how it looks now that everything is said and done.


I thought about doing french seams but ended up just serging them. I like that it cuts down on bulk.


When I uploaded some of these pictures turned out saturated, but the fabric really is navy not bright blue. (Edit: I fixed it. Apparently there was some auto photo enhance option that needed to be turned off)


The detail in the back adds some interest, if I made another one I would probably make the back lower cut with criss cross straps or something. Just for variety.


 I feel like my leg looks weirdly photo shopped in this photo by my knee. I swear if I had edited my pale thin legs they would look more normal.


I probably could take the sides of the shorts in a bit, they seem to fit tighter on most of the makes I've seen, but they are comfy the way they fit now so I hate to mess with it.


Problem solving.


This robe is not a new make. I want to say I made this in either December or January, but I'm not entirely sure. 


 The pattern is simplicity 1562. I'm not sure I would really recommend it. There are a lot of robe patterns out there and this one is not great. I added the hanging loop on the back and added side seam pockets instead of patch pockets. I think I cut the smallest adult size.


I also changed the sleeves to have sewn on cuffs, like the 7 year old worn out rtw robe I was replacing had. I made my pockets a little too low. I have to stretch my fingers out all the way to touch the bottoms.


Two parts of the pattern really got to me. First the instructions do not tell you to sew down the really wide facing that runs along the opening. You are just supposed to let that thing flap in the breeze. And then if you do sew it down it's like six inches wide so it will look ridiculous on the outside unless you do some invisible hand stitching. I tried that and I could still see the tiny puckers on the outside and it was killing me. So I did some investigating on my rtw, cut the facing down to a couple of inches, finished edge and sewed it down.


 It looks a tad wonky in this photo, but it doesn't bother me too much. The other thing that got me was the robe tie was wayyy shorter than my rtw one, like 9" shorter. It's long enough to tie it once but that's it, there's nothing fancy happening with it. It is not long enough to hit other people with while wearing it either. I think it was also one piece for all sizes which blew my mind.


The fabric I used is red ultra cuddle fleece from Jo Anns. It is super soft and comfy so no regrets there. It does shed really bad so seam finishing is a must.


I love making my own clothes and having nice long sleeves. Rtw ones are always too short.


On to cat shorts!


I might have directly copied another blogger because I am a big fat copy cat. The fabric is Catnap by Lizzy House.


The pattern I used was a free download called Weekend Linen Shorts from sew daily. It didn't come with instructions but I wasn't worried about it. I cut whatever the smallest size was.


I added in seam pockets because I am a firm believer in pockets.


They are a little loose but comfy.


If I had owned the Carolyn Pattern when I made these I probably would have used that shorts pattern instead, but it's probably best I didn't so I have more variety. I think I do like the pockets better on the Carolyn though as opposed to my inseam ones.


Cute kitty faces. I just happened to have this (rtw) tank top in a very similar coral color to the cats cheeks, so I deemed them a set. 


I'm actually really allergic to cats, but I love them anyways. These are the only ones allowed in my bed though.


My drawstring is purely decorative, it just goes in one button hole and out the other with a small stitch in-between to stop it from coming all the way out. I don't really like the bulk of functional drawstrings and I make my elastic tight enough not to need them, but I like the way it looks.


Monday, March 2, 2015

Orange Plaid PJ Pants

Guess who made more pj pants?

Also, I bought the fabric to makes these at least a few months ago, so I can call that stash busting, right? It's a french terry from Girl Charlee, I don't think it's available anymore.

 I used Simplicity 2061 again, view D same as here

I made some attempt at pattern matching, but it got a little off at the pockets. I'm pretty sure I can live with it though.


I really like how the pattern looks up close, I think it looses something when it's too far away and just looks like regular plaid.


Inside is a soft terry

The only fit changes are the same ones on my pattern from last time, added length to the legs and lowered the rise.

 Self fabric tie makes me happy


Sunday, February 15, 2015

Valentine's Day Boxers

So, I am pretty sure everyone needs ridiculously exciting boxers for Valentine's Day, so I made  my boyfriend these.  

When I sent him a text telling him I made him something cheesy he sent back 'oh dear' and I almost lost it because, of course they are deer. 


The fabric is something my parents bought me a couple months ago from the thrift store, apparently this is just the sort of thing that screams me. As soon as I saw it I knew that it was destined to be boxer shorts. 

The pattern is a free download from Measure Twice Cut Once  called the Darcy Boxer Shorts. I cut a size small after comparing it to a pair of boxers that I might have borrowed (without asking) from my boyfriend. They were labeled 28-30, and another pair said small, so I think the sizing is pretty accurate. 

I used exposed plush elastic, the instructions have you butt the ends against each other and then zigzag stitch which I hadn't tried before but it gives a less bulky finish and seems pretty strong. 


I didn't follow most of the directions because I wanted to do flat felled seams. I have never done these before (I used french seams last time I made boxers) but I really wanted them to have that strong and RTW looking finish. You know, with deer hearts.

I was confused about how to do the fly with the flat felled seams and the order to do them in, so I followed this bloggers construction description and it worked out pretty well. 

Other changes I made from the pattern, I used one button instead of two, this just seems to be how most of my bf's RTW boxers are so it's what I did, and doing a double fold hem at the bottom instead of just an edge finish and fold, that just seemed sloppy after I had already done the flat felling.

 Showing the inside finishes and stitching.

The only problems I had were due to not paying enough attention to what I was doing. For example: cutting two of the left front piece instead of two of the back piece and then not noticing until after I had flat felled the inseams together...sewing after the bobbin thread ran out...not properly centering the button hole, ect.

Inside, showing the fly shield 

Overall I was pretty happy with how they turned out. I would use this pattern again, but I might tweak the seam allowances to make the flat felling easier and the bottom hem a little wider. I might also add to the top next time to encase the elastic, which I think is a little neater and bf thinks more comfortable (although he said these were fine and wore them for the rest of the day without complaint.)

I will definitely be on the lookout for more boxer worthy fabric...

Friday, February 6, 2015

Black and White Striped Rug

I've been really wanting a rug for the little area between my bed and closet lately, particularity something with stripes (a symptom of too much time on Pinterest?) The prices of rugs however are a bit ridiculous and not in my budget, so I sewed one. I couldn't really find any tutorials online other than several that involve covering a rubber mat with fabric and coating the fabric with polyurethane, which didn't seem suitable for my situation. So I kind of made it up as I went along.


Overall, I'm pretty happy with the result! The fabric I used is Nate Berkus - Ondine Paramount Onyx, which sounds pretty fancy. Available from Jo Anns here. It says it has a soil and stain repellent finish, which I didn't even notice until after I bought it, but that should help with cleaning. It's not exactly a high shoe traffic area either, so I think it will hold up okay.  


This is the bottom of the rug. To make it I just ironed fusible fleece to the back leaving an inch gap on all sides, then folded the edges in, and in again so it has a 1/2" edge and sewed. The fleece gives it a bit more body and cushion.


Stitched edge on the right side


I also bought a no slip rug pad at target to go under it. It helps stop it from moving and also gives it a little more cushion. For this size (3'x5' I think) it was about $6.


 I wanted to make it big enough to go under the legs of the bed to also make sure it wasn't going anywhere. It's a little bunched up in this photo, but I was trying to lift the bed and move it under with my foot (and surprise surprise it didn't go so well), everyone else in my house was asleep (and I'm not patient). 


My closet doors are mirror so I can make it look extra trippy (or maybe like I made a bigger rug?) 

Monday, February 2, 2015

Tree Print Pillow, Hamper, Arrow Curtains

I've been revamping my bedroom a bit, got rid of a much of clutter and garbage, and did some sewing. So far I've made curtains, a hamper, and some pillows.


For the drapes I used this tutorial. The fabric is from Fabric.com, and I used blackout lining from Jo Anns.

Inspiration photo from here

I've been seeing this tree print pillow around a lot and I decided to make my own. I also really love the print of the bag and want to use that too.


I used a pillow form that I bought at the goodwill for like $2 because I am too cheap for the ones at Jo Anns (even on sale). I just unzipped the cover that was on it and bam!, pillow form.   


The fabric is white bottom weight cotton from Jo Anns. I printed out the inspiration tree, traced that onto my lino block, carved it and inked it up with some acrylic paint mixed with textile medium. After it dried I ironed it to set it and sewed in my zipper.


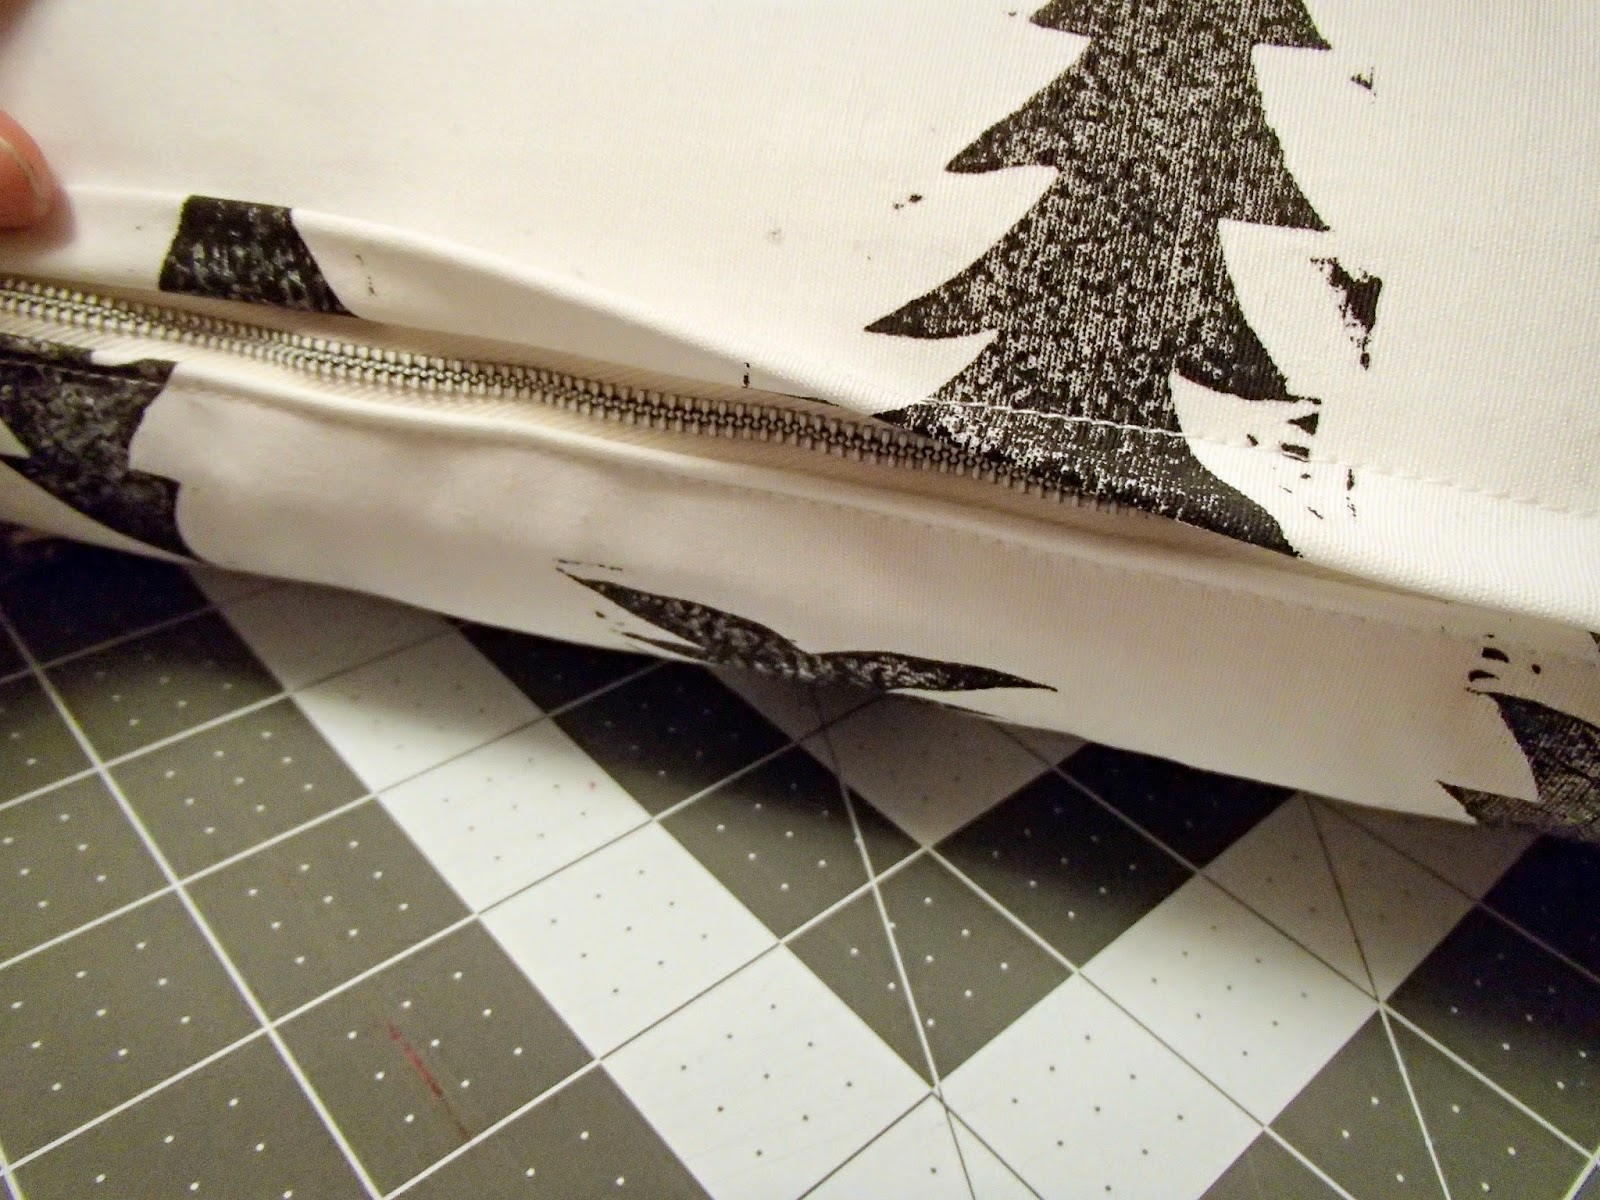
I got fancy and put in a lapped zipper using this tutorial for help. I happened to have a white metal zipper in the right length that came from a bag of them bought at a thrift store. Mine definitely has a hand stamped look about it, but I'm pretty happy with it. My mom said she really liked the fabric and thought I bought it like that, so there's that. I'm planning on doing the half circles in lino the same way.


I made the hamper using this tutorial. I changed it by making it slightly larger, not folding the top down into a cuff, and I lined mine. Oh, and I used fusible fleece to give it a bit more body. The gray spotted fabric is home decor but not very thick. It's still not very rigid, but it stays up and open with clothes in it.


Both the fabric and the fusible fleece are from Jo Anns. I kind of like the play between the geometric outside and frilly floral inside.


Handles!


I wash my work uniforms separate from the rest of my clothes, so I have two hampers. I'm planning on making a half height one to put next to it and replace the cheap plastic one (dollar store). I might print the half circles for it, not sure yet. 

Wednesday, December 10, 2014

V Detail Raglan Shirt


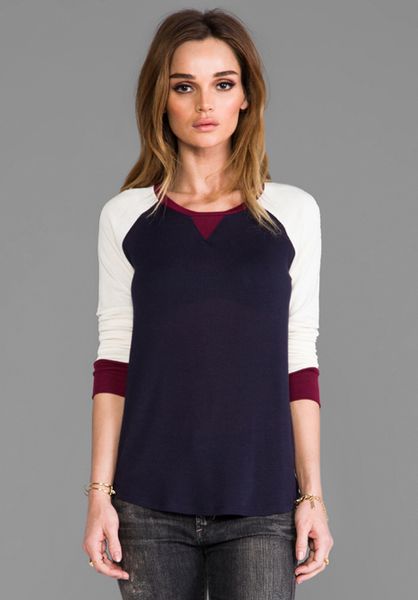
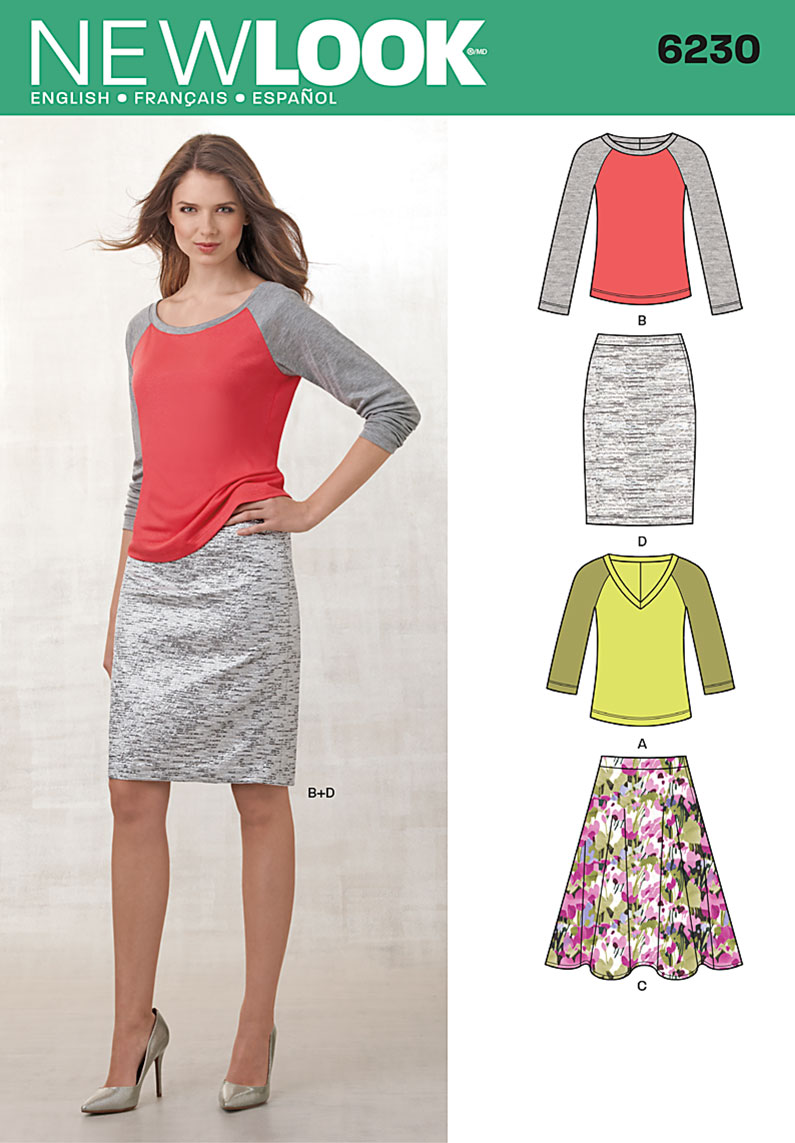
I saw the inspiration for this shirt some months ago, back when I made this henley raglan shirt using New Look 6230. I really liked the navy, white and burgundy color combination and the V detail at the neckline. Apparently this shirt is part of the Whetherly Clothing Collection and retailed for $136 (???), although it is now sold out. 


Whetherly Colorblock Jade Baseball Tee in Navy in Blue (Navy & Creme & Merlot)

This project was kind of exciting to me because it is the first one I have done almost entirely on my serger. Huzzah! I have had my serger for months now (a Singer Professional 5), but was having problems with it so I took a private lesson and found out I didn't have the needle pushed up all the way. Doh. But now I can use it and that's what matters.


When I see this picture all I see is that tuft of my hair that is sticking out crazily 


I think I prefer to have the sleeves pushed up, like the model is wearing in the inspiration photo, but I wanted to make the sleeves long enough to go either way.


I used New Look 6230 again with a few tweaks from my last use. I raised the back neckline a bit, made the front and back hem scoop for defined (not sure if it looks a ton different), used the long sleeves this time and added the cuffs (just kind of measured and winged those), and I used the neck binding that came with it this time which turned out to be much too loose, but I did make changes to the neckline so I can't really fault the pattern.


 For the V detail I marked where I wanted it and stitched just inside of that using tissue paper so it wouldn't stretch, then I clipped inside the triangle and folded the edges under, then added the ribbing underneath pinned and sewed. My triangle did grow bigger then I had intended, I'm not sure I used the best technique but I think it looks alright for a first attempt. 


Forgive the wrinkles in these photos, it's not a fabric that wrinkles really easily, I just pulled it out of the hamper to take these photos and didn't bother to do anything about it...but looked! Serged insides! 


For the fabric I used left over navy from my last raglan shirt which came from Girl Charlee, the white is organic interlock from Fabric.com, which is very soft and nice, and the burgundy is from a ribbed knit tank top I didn't wear. In retrospect the burgundy fabric wasn't the best choice because it doesn't have good rebound after being stretched.


 It's not perfect, the V detail and neckline are still a little wonky, but to me it's entirely wearable.


As for more inspiration, I am kind of digging something like this


Striped Knit Baseball Tee

Or this